Installation of Roles for SCCM CAS Installation
On Server manager click on "Add roles and features":-
Check if the “Role-based or feature-based installation” is selected & click next:-
Check the server name & click on next:-
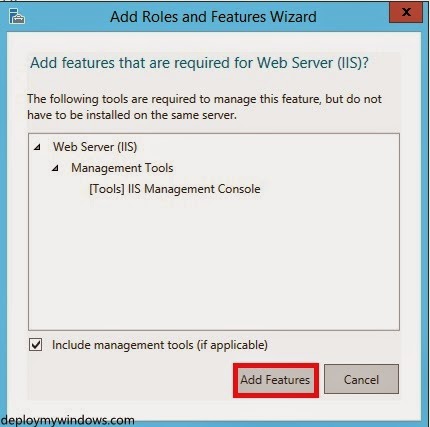
Select “Web Server (IIS)” role:-
Click on "Add Features", these are the default features which gets installed with IIS:-
Click Next, to continue:-
In the Features Selection Windows, Check "Background Intelligent Transfer Services (BITS)":-
Click on "Add Features" These are the default features installed by BITS :-
In the same features selection windows, Check "Remote Differential Compression" & Click Next:-
On the IIS Feature Installation page, Click on Next:-
Select the following IIS Features:-
Common HTTP Features
- Default Document
- Directory Browsing
- HTTP Errors
- Static Content
- HTTP Redirection
- HTTP Logging
- Logging Tools
- Request Monitor
- Tracing
- Static Content Compression
- Request Filtering
- Basic Authentication
- IP & Domain Restrictions
- URL Authorization
- Windows Authentication
- .NET Extensibility 3.5
- .NET Extensibility 4.5
- ASP
- ASP .NET 3.5
- ASP .NET 4.5
- ISAPI Extensions
- ISAPI Filters
- IIS Management Console
- IIS 6 Management Compatibility
- IIS 6 Metabase Compatibility
- IIS 6 Management Console
- IIS 6 Scripting Tools
- IIS 6 WMI Compatibility
- IIS Management Scripts and Tools
- Management Service
As mentioned in the below screenshots -
Note - Select all the needed feature as per the above list and then click on Next to continue.
After Selecting all the features click on Next to proceed to the installation page:-
Click on "Install" to begin the Installation:-
After a Successful Installation, Click on Close to end the wizard:-
Important Links:-


No comments:
Post a Comment